Crafting Your Own Homemade Grain-Free Rawnola Cereal: A Guide to Wholesome Goodness
Are you looking for a delicious, nutrient-dense breakfast option that aligns with your health goals? Look no further than homemade grain-free rawnola cereal. This delightful concoction is a game-changer for anyone seeking to reduce their grain intake, boost their energy levels, and enjoy a satisfying meal without compromising on taste. Unlike conventional cereals laden with refined sugars and questionable additives, crafting your own rawnola puts you in complete control of the ingredients, ensuring a pure, wholesome start to your day. If you're curious about the broader spectrum of benefits that going grain-free with your rawnola can offer, be sure to explore our article on Unlock Wellness: The Benefits of Grain-Free Rawnola.
In a world increasingly conscious of clean eating, rawnola stands out as a beacon of simple, unadulterated goodness. It's not just a cereal; it's a testament to the power of raw, whole foods. The beauty of making it yourself lies in its incredible versatility, allowing you to tailor every aspect to your dietary needs and taste preferences. From the choice of nuts and seeds to the type of natural sweetener, every ingredient can be handpicked to create a breakfast experience that's uniquely yours and undeniably healthy.
Why Choose Homemade Grain-Free Rawnola Cereal?
The decision to make your own homemade grain-free rawnola cereal is an empowering one, offering a multitude of benefits that packaged alternatives simply cannot match. When you opt for homemade, you're not just preparing food; you're investing in your health and well-being. Here’s why it’s the superior choice:
- Unparalleled Ingredient Control: Store-bought cereals, even those marketed as "healthy," often contain hidden sugars, unhealthy oils, artificial flavors, and preservatives. By making your rawnola at home, you dictate every single component. You can choose organic nuts and seeds, natural sweeteners like dates or maple syrup, and avoid any unwanted additives, ensuring a truly clean and nourishing product.
- Customization for Dietary Needs: Whether you're following a Paleo, Keto, Whole30, or simply a gluten-free lifestyle, homemade rawnola is incredibly adaptable. You can easily adjust ingredients to meet specific macronutrient goals, avoid allergens, or cater to particular taste preferences. Want more healthy fats? Add extra pecans and chia seeds. Craving a chocolatey twist? Incorporate raw cacao powder. The possibilities are endless.
- Superior Freshness and Nutrient Retention: Raw ingredients, by their very nature, retain more enzymes and nutrients than their cooked counterparts. Since rawnola is often made without baking (or with minimal dehydration), the vital nutrients in nuts, seeds, and dried fruits remain intact. Plus, preparing it fresh means you're consuming it at its peak nutritional value.
- Cost-Effectiveness: While the initial investment in high-quality nuts and seeds might seem substantial, making your own rawnola generally proves more economical in the long run compared to purchasing specialty grain-free cereals from health food stores. Buying ingredients in bulk can significantly reduce the per-serving cost.
- Elimination of Grains: For many, grains can cause digestive issues, inflammation, or contribute to blood sugar spikes. A grain-free diet can lead to improved digestion, sustained energy, and better overall health. Your homemade grain-free rawnola cereal provides all the crunch and satisfaction of traditional cereal without the grains.
Understanding the Core Ingredients for Your Homemade Grain-Free Rawnola Cereal
The beauty of homemade grain-free rawnola cereal lies in its simplicity and the power of its whole-food ingredients. Crafting this nutritious breakfast involves a thoughtful selection of nuts, seeds, and natural sweeteners, all working in harmony to deliver flavor, texture, and a wealth of health benefits. Here’s a breakdown of the essential components:
- The Foundation: Nuts
- Almonds: A staple for good reason, offering vitamin E, magnesium, and healthy monounsaturated fats. They provide a satisfying crunch.
- Walnuts: Rich in omega-3 fatty acids, antioxidants, and anti-inflammatory compounds. Their slightly bitter edge complements other flavors.
- Pecans: Buttery and naturally sweet, pecans are packed with antioxidants and healthy fats, contributing a rich depth of flavor.
- Cashews: Softer and creamier, cashews add a milder taste and can help bind the rawnola together when processed.
- Tip: Soaking nuts overnight and then dehydrating them can improve digestibility and nutrient absorption.
- The Nutrient Boosters: Seeds
- Pumpkin Seeds (Pepitas): A great source of zinc, magnesium, and iron. They offer a distinct nutty flavor.
- Sunflower Seeds: Abundant in vitamin E, selenium, and B vitamins. They provide a mild, slightly sweet taste.
- Chia Seeds: Tiny powerhouses of fiber, omega-3s, and protein. They also help absorb moisture and create a binding effect.
- Flax Seeds: Another excellent source of omega-3s and lignans, beneficial for digestive health. Ground flax works best for absorption.
- Hemp Hearts: Soft, chewy, and rich in protein and omega-3s. They add a delicate, nutty flavor.
- The Natural Sweeteners & Binders:
- Medjool Dates: These are the star binder! Their natural stickiness and rich sweetness are perfect for holding the rawnola together without baking. They also contribute fiber and potassium.
- Maple Syrup or Agave Nectar: Liquid sweeteners can be used in smaller quantities to enhance sweetness and aid in binding, especially if your dates aren't sticky enough.
- Honey: Another natural liquid sweetener option, offering its unique flavor profile.
- The Flavor Architects:
- Raw Cacao Powder: For a delicious chocolatey rawnola.
- Vanilla Extract: Enhances sweetness and adds aromatic depth.
- Cinnamon, Nutmeg, Cardamom: Warm spices that elevate the flavor profile, especially good for a comforting breakfast.
- Sea Salt: A pinch of salt balances the sweetness and brings out the flavors of the nuts and seeds.
- Optional Add-ins for Texture and Taste:
- Unsweetened Coconut Flakes: Add a tropical touch and extra healthy fats.
- Dried Fruits (in moderation): Small amounts of dried cranberries, goji berries, or mulberries can add bursts of flavor and chewiness, but be mindful of their sugar content.
By thoughtfully combining these ingredients, you create a symphony of flavors and textures that make your homemade grain-free rawnola cereal a truly satisfying and nourishing meal.
The Simple Steps to Crafting Your Perfect Homemade Grain-Free Rawnola Cereal
Making your own homemade grain-free rawnola cereal is surprisingly straightforward, requiring minimal equipment and no actual cooking. The process is more about assembly and texture creation, allowing you to achieve your ideal crunch and consistency. Here’s how you can do it:
Step 1: Preparation is Key
Before you begin, gather all your chosen nuts, seeds, sweeteners, and flavorings. For optimal digestibility and nutrient absorption, consider soaking your nuts and larger seeds (like almonds, walnuts, pumpkin seeds) for 4-8 hours, or even overnight. After soaking, rinse them thoroughly and dry them completely, either by patting them down with a clean towel or using a dehydrator on a low setting. This step is optional but highly recommended for those with sensitive digestion.
Step 2: Processing for Texture
The core of rawnola lies in achieving that satisfying crumble. You'll need a good food processor for this. Start by processing your tougher nuts (like almonds and walnuts) and some of the larger seeds first. Pulse them in short bursts until they reach your desired texture – anywhere from a fine meal to larger, chunky pieces. Avoid over-processing, as you don't want to turn it into nut butter. Transfer these to a large mixing bowl.
Step 3: Creating the Binder
Next, process your pitted Medjool dates in the food processor. If your dates are dry, soak them in warm water for 10-15 minutes before processing, then drain well. Process until they form a sticky ball or a thick paste. This date paste is crucial for holding your rawnola together.
Step 4: Combining and Flavoring
Add the date paste to your bowl with the processed nuts and seeds. Now, incorporate your remaining seeds (like chia, flax, hemp hearts), any liquid sweeteners (maple syrup, honey), vanilla extract, spices (cinnamon, nutmeg), sea salt, and any optional add-ins like cacao powder or coconut flakes. Using your hands (or a sturdy spoon), thoroughly mix everything together. Squeeze and press the mixture to ensure the date paste is evenly distributed and coats all the dry ingredients. You're looking for a mixture that clumps together when squeezed but still crumbles easily.
Step 5: Dehydration (Optional, but Recommended for Shelf Life)
While you can eat rawnola immediately, dehydrating it enhances its crunch and significantly extends its shelf life. Spread the rawnola mixture thinly and evenly on a dehydrator tray lined with a non-stick sheet. Dehydrate at 105-115°F (40-46°C) for 8-12 hours, or until completely dry and crispy. Stir occasionally to ensure even drying. If you don't have a dehydrator, you can use your oven at its lowest possible setting (usually around 150-200°F or 65-93°C) with the door slightly ajar to allow moisture to escape. This will take 2-4 hours, so watch it closely to prevent "baking" it.
For a detailed, step-by-step guide with specific measurements, check out our Delicious Homemade Grain-Free Rawnola Cereal Recipe!
Step 6: Storage
Once your rawnola is completely cooled and crunchy, transfer it to an airtight container. Store it at room temperature for up to 2-3 weeks, in the refrigerator for up to a month, or in the freezer for several months. Ensure it's fully dried before storing to prevent mold.
Practical Tip: To achieve a finer, more traditional cereal-like texture, process all ingredients for longer. For a heartier, granola-like feel, use fewer pulses and leave larger chunks of nuts.
Troubleshooting: If your mixture is too dry and won't clump, add a tablespoon of water, maple syrup, or an extra pitted date and re-process. If it's too wet, add a few more ground nuts or seeds.
Creative Ways to Enjoy Your Homemade Grain-Free Rawnola Cereal
The versatility of your homemade grain-free rawnola cereal extends far beyond the breakfast bowl. Once you've mastered the art of making it, you'll discover countless ways to incorporate this nutritious and delicious concoction into your daily routine. Here are some creative ideas:
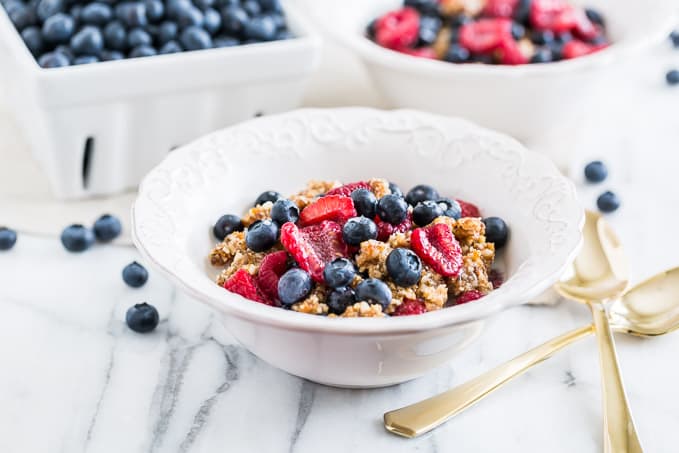
- Classic Breakfast Bowl: The most straightforward way! Serve your rawnola with your favorite milk – whether it's almond, coconut, cashew, or even traditional dairy milk. Add fresh berries, sliced banana, or a drizzle of extra maple syrup for a delightful morning meal.
- Yogurt Parfait Power-Up: Layer your rawnola with dairy or non-dairy yogurt and fresh fruit for a vibrant, protein-packed parfait. It adds fantastic crunch and texture, making your parfait even more satisfying.
- Smoothie Bowl Topping: Elevate your morning smoothie or acai bowl by sprinkling a generous handful of rawnola on top. It provides a delightful contrast to the creamy base and adds an extra nutritional boost.
- On-the-Go Snack: Rawnola makes an excellent, wholesome snack all on its own. Pack a small portion in a reusable container for a quick energy boost during work, school, or outdoor adventures.
- Energy Bites or Bars: If you process your rawnola mixture slightly finer and firmer, you can press it into a pan to create homemade bars, or roll it into energy bites. These are perfect for meal prepping healthy snacks throughout the week.
- Dessert Enhancement: Use rawnola as a topping for fruit crumbles (after baking), a crunchy layer in raw cheesecakes, or simply sprinkled over a bowl of sliced fruit for added texture and flavor.
- Salad Sprinkler: For an unexpected crunch and a burst of savory-sweet flavor, sprinkle a small amount of unsweetened or lightly spiced rawnola over your green salads. It's a fantastic alternative to croutons!
Experiment with different flavor profiles in your rawnola (e.g., ginger-turmeric, lemon-poppy seed, mocha) to expand its use even further. With its incredible taste and nutritional density, your homemade grain-free rawnola cereal is sure to become a staple in your healthy kitchen.
Conclusion
Embarking on the journey to create your own homemade grain-free rawnola cereal is a rewarding experience that empowers you to take control of your diet and nourish your body with wholesome, unprocessed ingredients. From the initial selection of nuts and seeds to the final satisfying crunch, every step allows for personalization, ensuring your rawnola perfectly suits your taste and health needs. Say goodbye to highly processed cereals and embrace the vibrant flavors and superior nutrition that only a homemade option can provide.
By following the simple steps outlined, you can easily craft a delicious, versatile, and nutrient-dense breakfast or snack that supports your grain-free lifestyle. Not only will you enjoy incredible taste and sustained energy, but you'll also benefit from the peace of mind that comes with knowing exactly what's fueling your body. So, gather your ingredients, fire up your food processor, and discover the joy of creating your very own batch of homemade grain-free rawnola cereal today – your body will thank you!
